Get to Know MailMaven
The Compose Window
When you create a new message (File > New Message, ⌘N), reply to a message, or forward a message, the window in which you write or edit the outgoing message is the compose window. Because it’s designed to create and not merely display messages, it has quite a few features not found in the viewer window.
Window Controls
This image shows the main controls in the compose window.
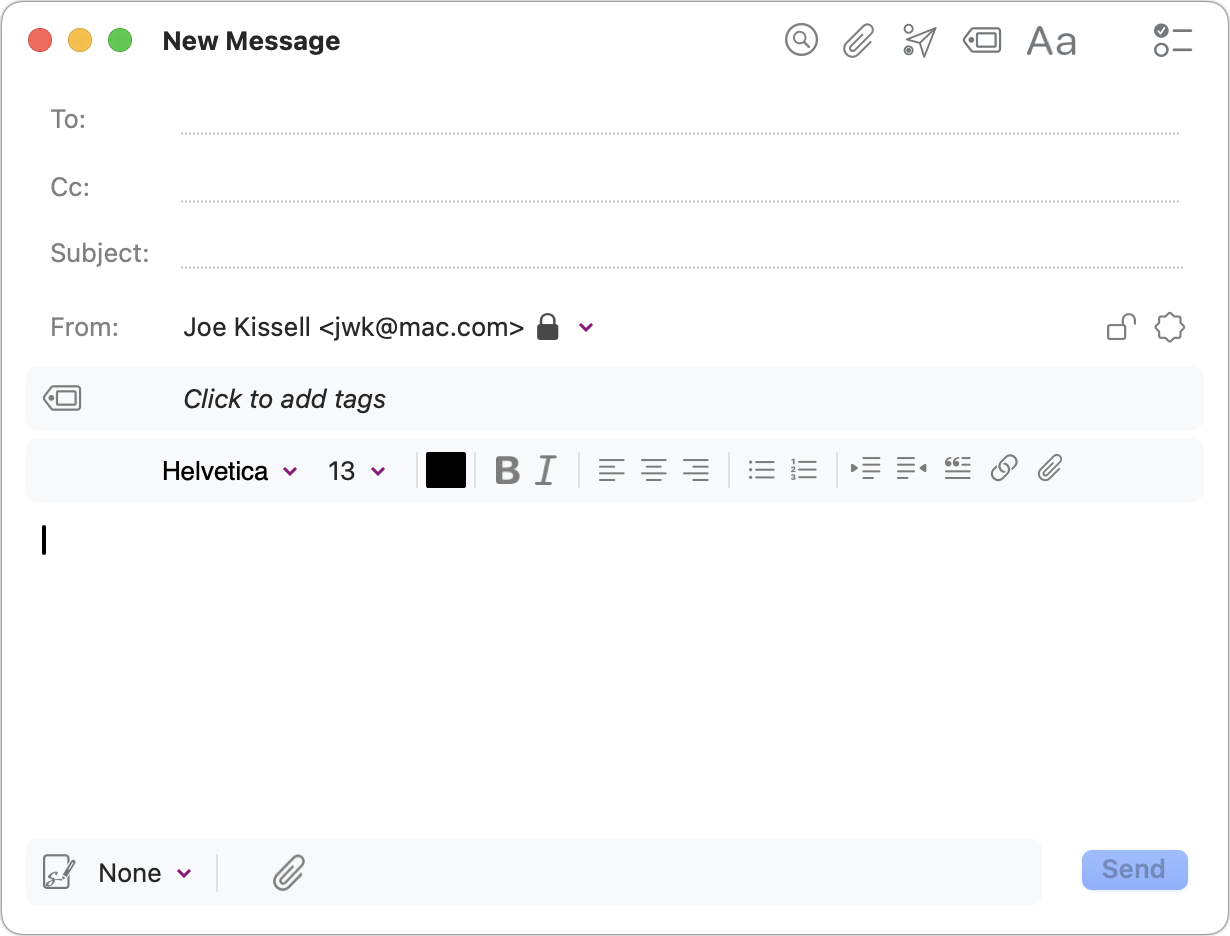
At the top is the subject (“New Message” is replaced with whatever you type in the Subject field). To the right of that is the toolbar, with the following controls:
- Search in Message
 : To search within the contents of the message you’re composing, click this icon or press ⌘F.
 - Attachments
 : Click this icon, which appears both at the top and the bottom of the compose window, and navigate to a file to attach it to the message. You can also drag in a file from the Finder.
 - Toggle Delivery Options
 : Click this to display the Delivery Options Bar in your message (see Setting Delivery Options, below).
 - Toggle Tags
 : Click this to display the Tag Bar in your message; the Tag window also appears automatically. See Adding Tags, below, for an overview or see Tagging Messages for complete details.
 - Toggle Formatting Bar
 : Click this to display the Formatting Bar in your message (see Formatting Messages, below).
 - Optional Fields
 : Click this icon to display a pop-up menu that lets you toggle the display of the Cc, Bcc, and Reply-To fields. Note that MailMaven remembers your choice here and displays the same fields in future messages.
In the header portion of the message are these controls:
- Address and Subject Fields: The To (and optionally Cc, Bcc, and Reply-To) fields and the Subject field, which can’t be blank. See Addressing Messages.
- From pop-up menu: Choose the account and email address from which you want to send the message from this pop-up menu. Addresses marked with a lock
 icon are those for which you can encrypt or digitally sign messages (see Encrypting and Digitally Signing Messages).
 - Encryption and Digital Signature icons

 : If your From address is configured to support encryption and digital signatures (again, see Encrypting and Digitally Signing Messages), these icons become visible.
Below that, you may see one or more additional bars (see Adding Tags and Setting Delivery Options), followed by:
- Composer: The main, blank portion of the compose window is the composer, where you type and format your messages.
- Signatures pop-up menu
 : Use this menu to choose a signature you’ve previously created and associated with this account. See Create Signatures for details.
 - Send button: Click this (or press ⇧⌘D) to send the message.
Formatting Messages
You can apply the usual range of formatting (font, size, color, style, alignment, lists, indentation, block quoting, links, and inline attachments) to any message using controls on the Formatting Bar or the Compose menu. If you don’t see the Formatting Bar, click the Toggle Formatting Bar ![]() icon at the top of the window.
icon at the top of the window.

If you prefer to send a message in plain text, choose Compose > Plain Text. Note, however, that even when you switch to Plain Text, formatting remains visible in the composer.
Addressing Messages
As you begin typing a name or email address in any of the address fields (To, Cc, or Bcc), MailMaven displays matching results from Contacts as well as people you’ve previously emailed. Click the one you want (or use the arrow keys to select it and press Return). You can also, of course, simply type or paste a complete address.
Adding Attachments
To attach a file without displaying it in the body of the message (even if it’s a graphic), click the paperclip ![]() icon, which appears both at the top and the bottom of the compose window, and navigate to a file to attach it to the message. You can also drag a file from the Finder to the Attachment area at the bottom of the window.
icon, which appears both at the top and the bottom of the compose window, and navigate to a file to attach it to the message. You can also drag a file from the Finder to the Attachment area at the bottom of the window.
To place an attachment at a specific point in your message, position the insertion point where you want it to go, click the paperclip ![]() icon on the Formatting Bar, and navigate to the file. Or, you can drag a file from the Finder into the body of the message.
icon on the Formatting Bar, and navigate to the file. Or, you can drag a file from the Finder into the body of the message.
Adding Tags
Tags (such as keywords, colors, projects, and review dates) help you monitor and locate messages. Just as you can tag incoming messages, you can also tag messages you’re composing. When you apply tags to outgoing messages, those tags are associated with the copy of the message in your Sent Mail mailbox.
To add a tag, click the Tag Bar if it’s visible (if it’s not visible, click the Toggle Tags ![]() icon). In the popover that appears, enter whichever tags you like. (You can also tag outgoing messages using the commands on the Message menu.)
icon). In the popover that appears, enter whichever tags you like. (You can also tag outgoing messages using the commands on the Message menu.)

For complete details, see Tagging Messages.
Setting Delivery Options
Ordinarily, when you click Send, MailMaven sends the message immediately. However, you have complete control over when the message is sent and what happens to your copy of the sent message afterward. To adjust delivery settings, make sure the Delivery Options Bar is visible; if not, click the Toggle Delivery Options ![]() icon.
icon.

The bar has three pop-up menus:
- Schedule: This pop-up menu can have any of four settings:
- Using Rules: The default setting, this processes the message through any outgoing rules you’ve set up (for details, see Outbox Rules). If you have no outbox rules, or if this message doesn’t meet the criteria for any, the message is sent immediately. The Apply Rules bullet, just ahead, provides further options.
- Immediately: Send the message right away, skipping any outbox rules.
- After Delay: Send the message after a fixed number of seconds, minutes, or hours. When you choose After Delay, additional controls appear, allowing you to set the delay period.
- At Time: Send the message at a particular date and time in the future. When you choose At Time, a popover appears with a calendar and time selector.
- Apply Rules: By default, when the Schedule is set to Using Rules, MailMaven applies all applicable outbox rules, but if you want to apply only specific outbox rules to this outgoing message (or none at all), use the Apply Rules pop-up menu to make your selections.
- Archive To: Normally, your copy of each sent message is stored in the Sent Messages mailbox, a logical place for it. If you want this one to go somewhere else, choose Other from the Archive To pop-up menu and select a mailbox.
Adding a Signature
A signature, which typically appears at the bottom of a message you compose, lets you add information about yourself or your organization without having to retype it manually each time. A simple signature might include elements like your name, title, email address, or phone number.
But MailMaven enables you to create any number of custom signatures that include various types of static and dynamic text and images, extensive formatting, and other features. You can then apply these signatures automatically or manually to outgoing messages.
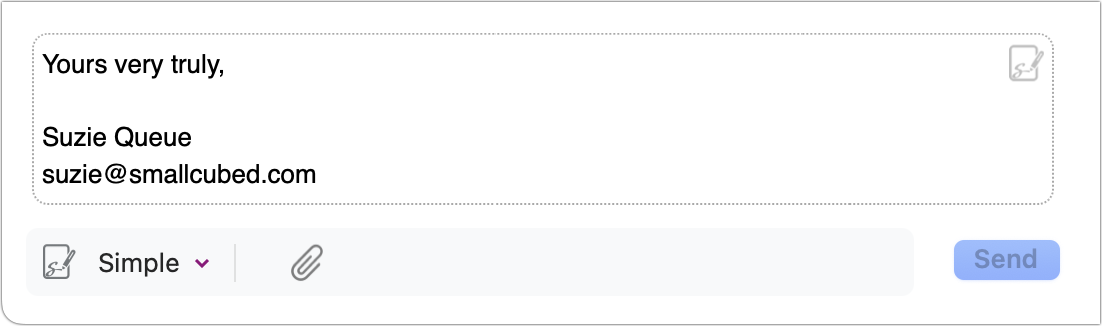
If you’ve already set up at least one signature and assigned it to the account from which you’re sending a message, you can choose it from the pop-up menu in the lower-left corner of the compose window. (If you’ve set a default signature for this account, it appears automatically.) You can also choose None from that menu to remove the signature, or Edit Signatures to jump directly to Settings > Compose > Signatures, where you can create new signatures. (In that case, you might want to skip ahead to Encrypting and Digitally Signing Messages.)
If not, read on for details about creating signatures.
Using signatures involves two broad elements:
- Creating one or more signatures and associating them with accounts (see Create Signatures, next)
- Setting a default signature for an account or overriding the default choice (see Setting Default Signatures and Choosing a Signature Manually, ahead)
Create Signatures
To create or edit signatures, go to Settings > Compose > Signatures.
Here, the overall process is:
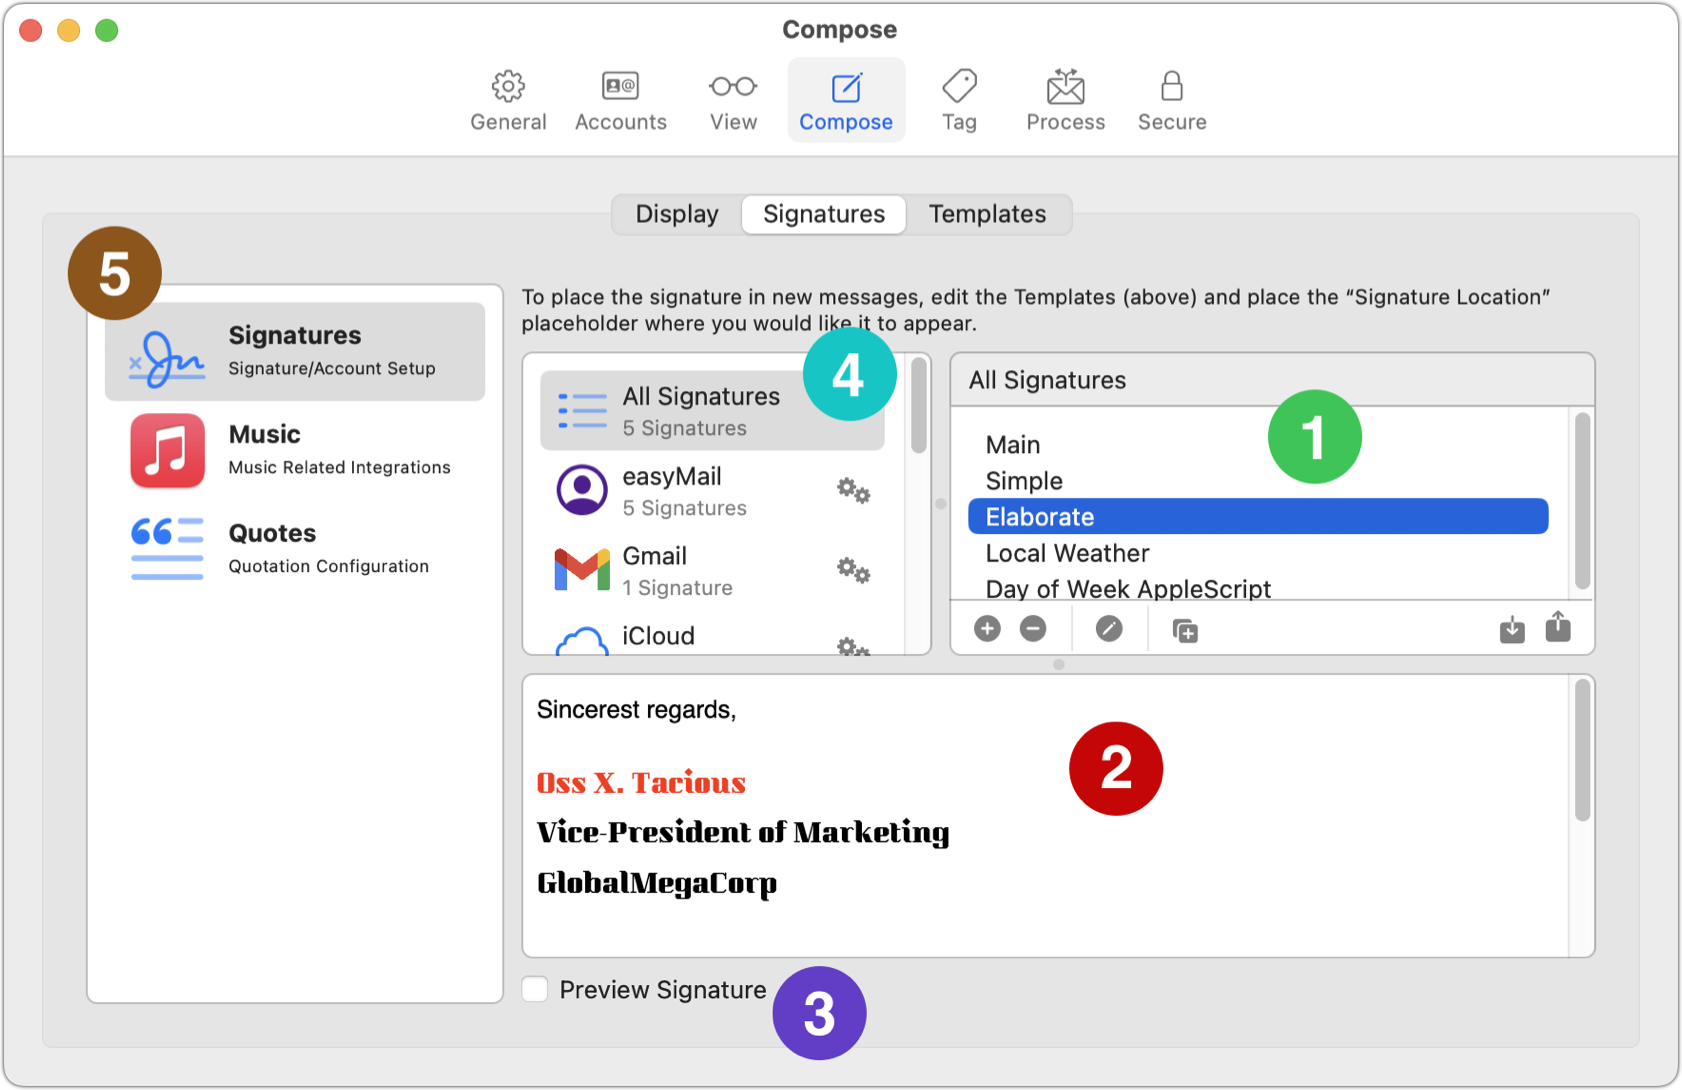
- Create one or more signatures, which appear in the All Signatures list ➊. The pane at the bottom ➋ shows the structure of the signature or, if Preview Signature ➌ is selected, what the signature will look like in your messages.
- Drag the signatures to the account(s) where you want them to be available ➍.
- For each account, use the Account Settings popover (not shown here) to specify default signatures, if any.
- If you want a signature to include information from the Music app or random quotations, set those up in the categories on the left side ➎.
To create a signature, follow these steps:
- Click the plus
 icon at the bottom of the signature list. An editing window appears.
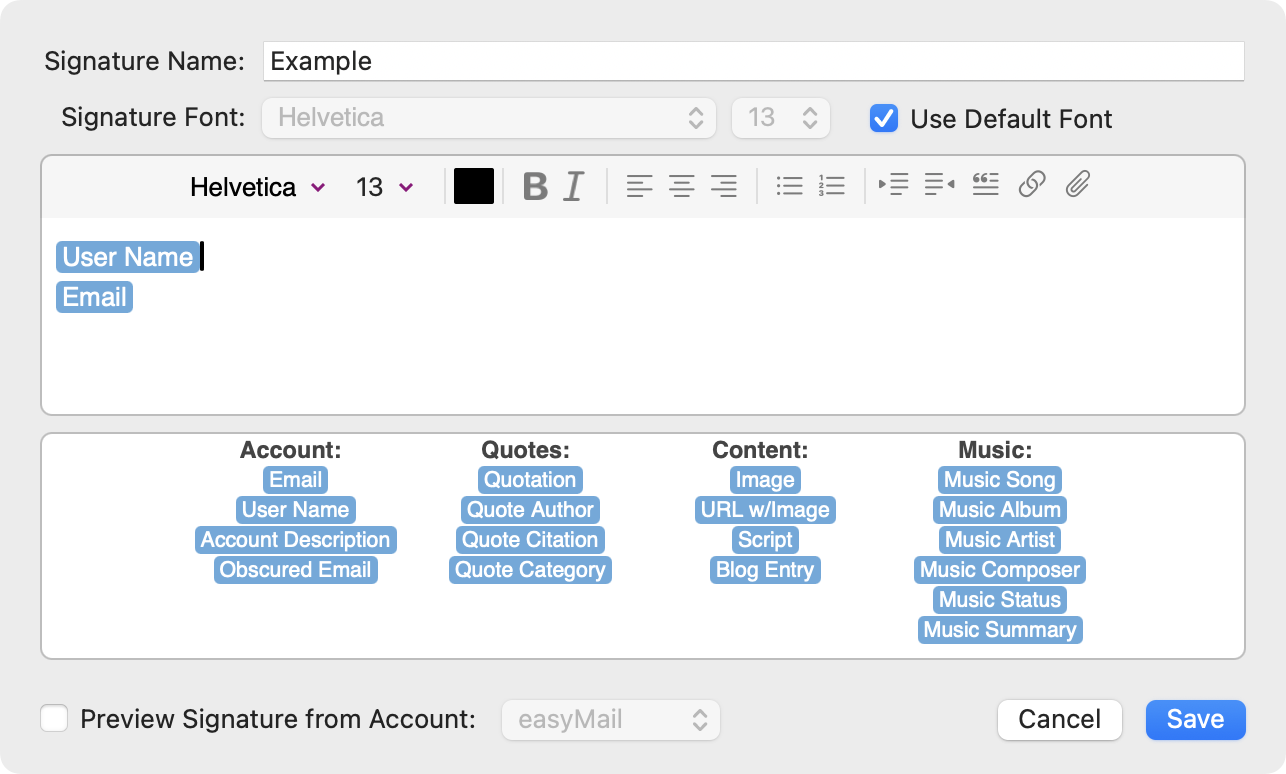
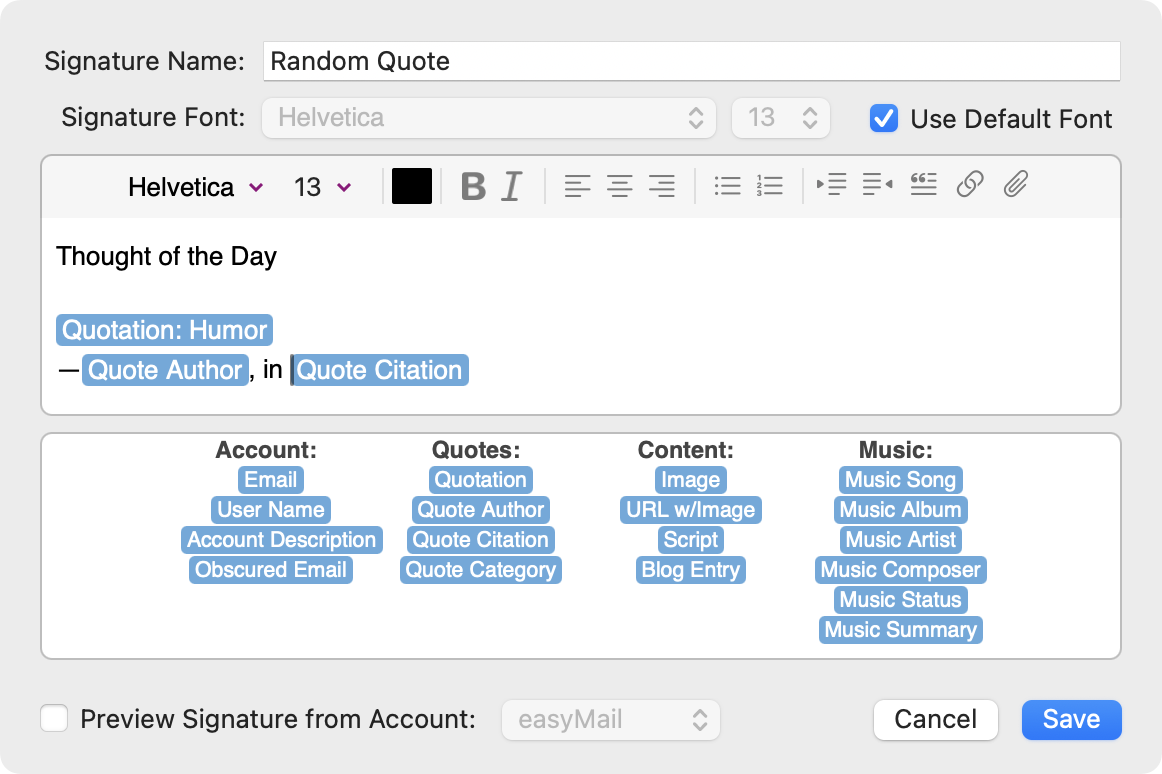
- In the top portion of this window, you can type any static text that you want to include in the signature (such as your title or address). Optionally use the formatting controls to add styling, links, and attachments. Formatting also applies to tokens (see About Tokens, next).
- Signatures can also include numerous dynamic elements—such as the email address or user name for the current account, a random quote, or the latest entry from your blog—indicated by blue tokens at the bottom (described next). Drag these tokens where you want the corresponding text or image to appear in your signature; when you compose a message, the tokens are replaced with the corresponding content.
-
When you’re finished designing a signature, click Save.
- In order to use your signatures, you must associate them with one or more accounts. To do so, drag a signature from the All Signatures list to an account; repeat for every signature you want to use with every account.
About Tokens
The available tokens are grouped into four categories.
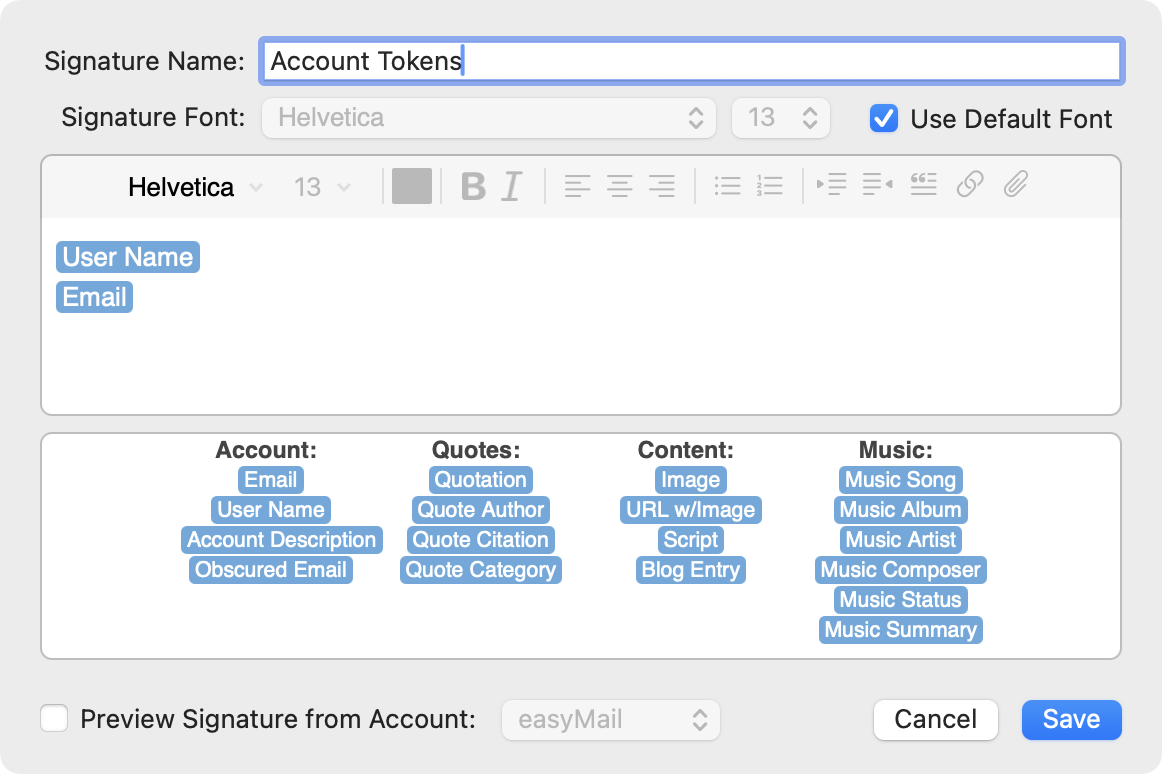
Account Tokens use information from whichever email account you’re using the signature with:
- Email: Your email address
- User Name: Your user name (or display name)
- Account Description: The title or name of the account, as shown in the mailbox list
- Obscured Email: A version of your email address with “dot” and “at” spelled out (as in “support at smallcubed dot com”, to reduce the likelihood of the address being used to create spam lists
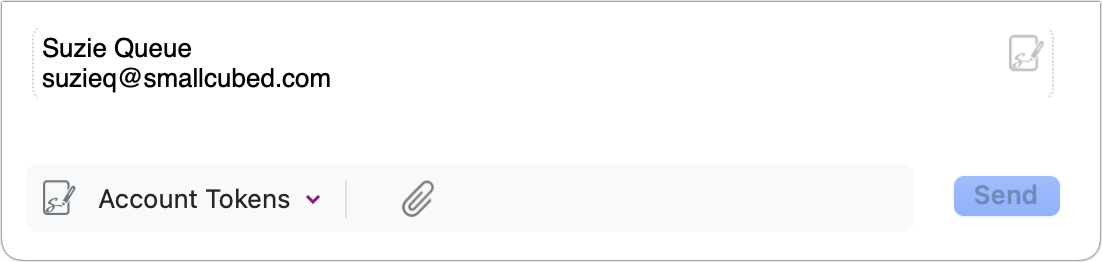
An example signature using account tokens, and how it appears in your message:
Quotes Tokens are used with lists of Quotes (described ahead):
- Quotation: Any quotation of interest to you
- Quote Author: Who originated the quote
- Quote Citation: The work from which the quote was taken
- Quote Category: The type of quote, such as Humor or Work
Content Tokens add more complex material to quotes:
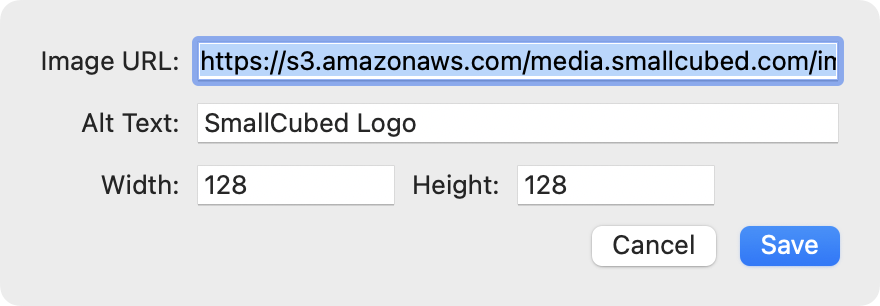
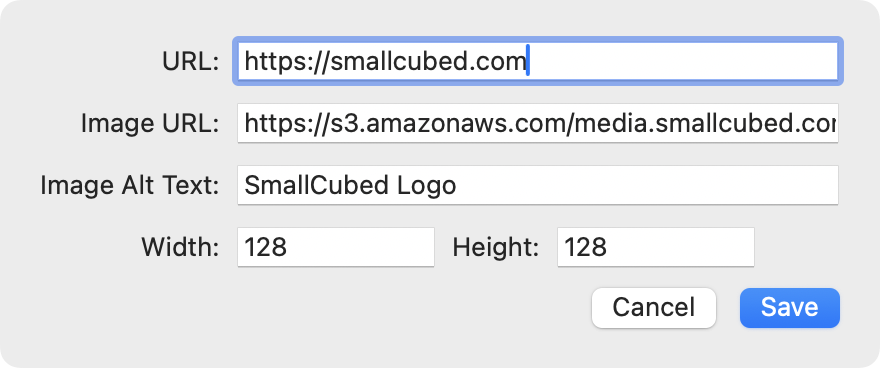
- Image: Insert an image found on a web server. When you drag this token into the signature, a dialog prompts you for the image’s URL, alt text, and optional width and height.
- URL w/Image: Insert an image found on a web server, and make the image a clickable link. When you drag this token into the signature, a dialog prompts you for the link’s URL, the image’s URL, alt text, and optional width and height.
- Script: The output of a script you provide (see Scripts, ahead).
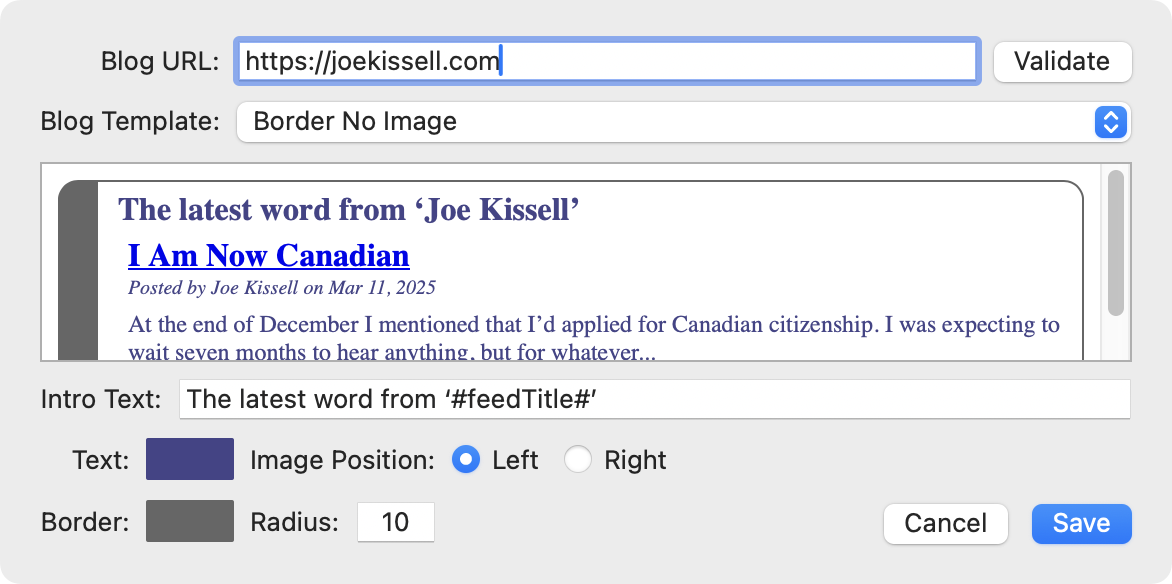
- Blog Entry: A snippet of, and link to, the most recent entry in any RSS feed. When you drag this token into the signature, a dialog prompts you for the blog’s URL (which can usually be the homepage, not necessarily the URL for the RSS feed itself), an optional template specifying the layout of the snippet, text to put before the snippet (by default, “The latest word from ‘#feedTitle#’, where #feedTitle# is replaced with the blog’s name, and styling options for the text and border.
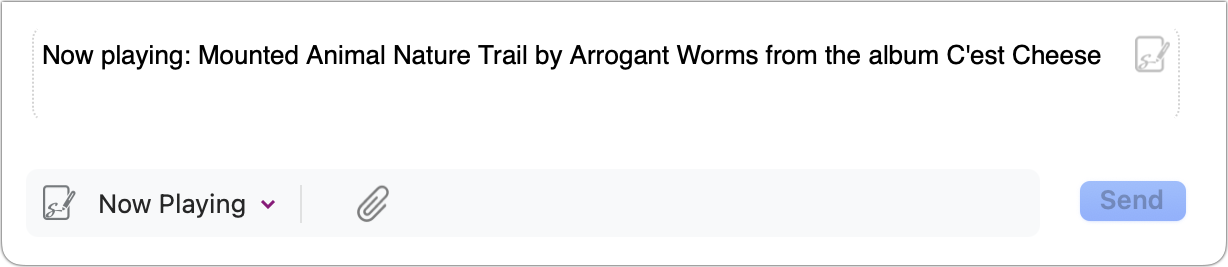
Music Tokens add information about what’s happening in the Music app:
- Music Song: The name of the track currently playing in Music.
- Music Album: The name of the album from which the currently playing track is taken.
- Music Artist: The artist performing the current Music track.
- Music Composer: The composer of the current Music track.
- Music Status: The current status of the Music app (“playing,” “paused,” or “stopped”). “Stopped” also appears if Music is not open.
- Music Summary: The summary as set in the Music view (see Music Summaries, next).
The first four of these tokens display text in the signature only if Music is playing something.
Music Summaries
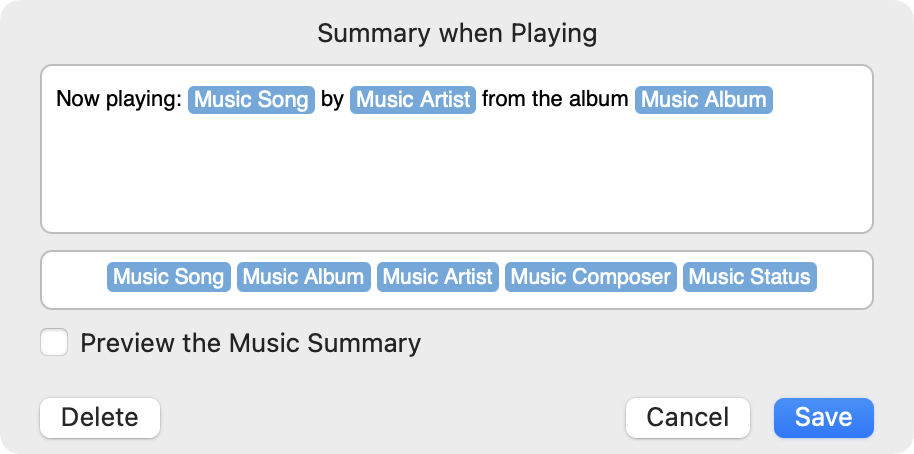
Another way to represent the current status in Music is to use a music summary, which appears wherever you place the Music Summary token. The music summary is one of four customized blocks—one each for when Music is playing, paused, stopped, and not running. Each block, can in turn, use any or all of the other Music tokens.
To create music summaries, select Music on the left side of the Signatures page. Then click in one of the four fields (Playing ![]() , Paused
, Paused  , Stopped
  , and Not Running
  ). In the dialog that appears, type any desired text and use the tokens to represent what you want your signature to say when Music is in that state.
Quotes
Select Quotes on the left to configure quotations to be used when a signature contains Quotation, Quote Author, Quote Citation, or Quote Category tokens. Maven chooses a random quotation from the selected categories each time you compose a message using that signature.
You can select any or all of SmallCubed’s prewritten quotes (in categories such as Humor, Philosophy, and Work), or create and import a file with quotations of your choice.
To use your own selection of quotes, first create a text file in the following JSON format and store that file somewhere on your Mac or at a publicly reachable web address:
    {
        "name": "Category Name",
        "description": "Category Description",
        "quotes": [
          {
            "q": "The Quotation",
            "a": "The Author",
            "c": "A Citation"
          }
        ]
    }
Example JSON file (for example, quotes.json):
    {
        "name": "H2G2",
        "description": "Quotes from the Hitchhiker’s Guide to the Galaxy",
        "quotes": [
          {
            "q": "Time is an illusion. Lunchtime doubly so.",
            "a": "Douglas Adams",
            "c": "The Hitchhiker’s Guide to the Galaxy"
          },
          {
            "q": "He felt that his whole life was some kind of dream and he sometimes wondered whose it was and whether they were enjoying it.",
            "a": "Douglas Adams",
            "c": "The Hitchhiker’s Guide to the Galaxy"
          }
        ]
    }
Within the quotations (“q”) sections, you can use common HTML tags such as <strong></strong>, <em></em>, <u></u>, and <br/>, as well as styling such as <span style=\'color:blue\'></>span>.
Once your file is ready, import it into MailMaven by clicking the plus ![]() icon at the bottom of the Random Quotation Categories list and either navigating to the local file or entering the URL for the file if it’s online.
icon at the bottom of the Random Quotation Categories list and either navigating to the local file or entering the URL for the file if it’s online.
With your quotation categories selected, create a signature that uses any or all of the items in the Quotes category.
Scripts
Signatures can include the output of scripts, such as shell scripts and AppleScripts.
To add a script, drag the Script token into your signature. MailMaven prompts you to select a file containing the script; note that this can be anywhere on your disk. Then a dialog appears in which you can optionally provide arguments to the script, set a timeout, embed the output as HTML, or surround the output in <pre></pre> tags, which also eliminate any line breaks within the script output.
Here are two very simple examples.
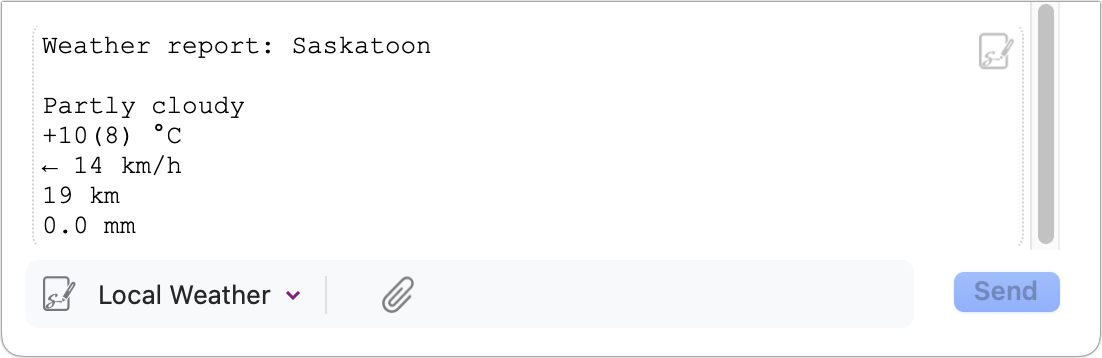
To show the local weather, save the following shell script as weather.sh, and add that Script to your signature. If you fill in a place name as the argument, the script returns the weather for that location; otherwise, it tries to guess your current location.
    #!/bin/bash
    if [ -z "$1" ]; then
        curl "wttr.in?0T" 2>&1 | sed '1,3d' | sed -E 's/^ .{13}//' | sed -E 's/^( |―) +//'
    else
        curl "wttr.in/$1?0T" 2>&1 | sed '1,3d' | sed -E 's/^ .{15}//'
    fi
The output might look something like this:
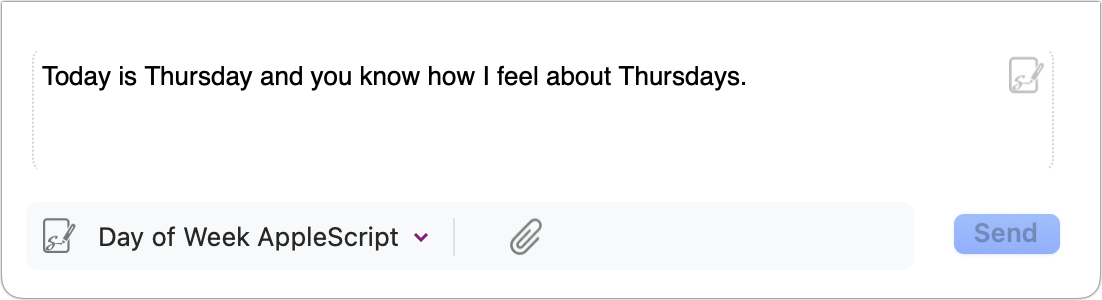
Here’s a simple AppleScript that use the current day of the week:
    set theday to weekday of (current date) as string
    return "Today is " & theday & " and you know how I feel about " & they & "s."
And here’s what it might look like in a signature:
Setting Default Signatures
Each email account can have a default signature, and if more than one email address (or alias) is associated with an account, each one of them can have its own default signature.
To set up default signatures:
- Click the Edit Account Settings
 icon next to an account in Settings > Compose > Signatures.
 -
To use the same signatures for all the addresses in the account, leave “Use same settings for all addresses/aliases” checked. To use different settings for each address, uncheck that and select an address.
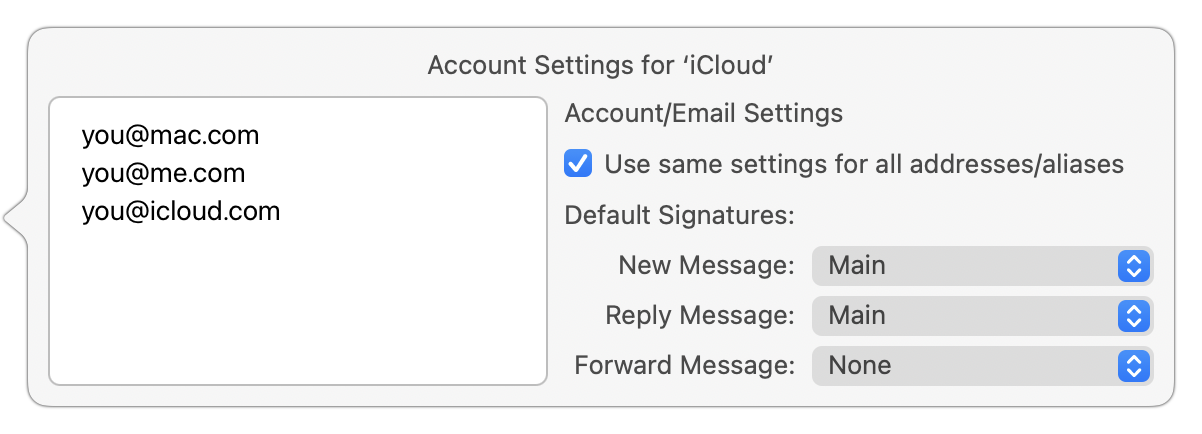
- From the pop-up menus under Default Signatures, choose which signature you’d like to use for new messages, replies, and forwarded messages. If you selected just a single address in step 3, repeat this process for each address.
Choosing a Signature Manually
When composing a message, you can override the default signature by clicking the pop-up menu in the lower-left corner of the compose window and choosing a different signature from the list. Remember, this list shows only those signatures you’ve previously added to this account.
Encrypting and Digitally Signing Messages
MailMaven can encrypt and/or digitally sign messages using PGP (or its open-source counterpart, GPG/GnuPG).
A digital signature (unlike a conventional, visible signature) is extra, hidden code added to your message that the recipient’s email app can use to verify that you (the person whose address is on the message) were really the one who sent it, and that it wasn’t changed or tampered with in transit. You can sign a message without encrypting it, but if you encrypt a message, it’s also signed.
Before you can sign or encrypt an outgoing message (or decrypt a message sent to you), you must have a PGP public/secret key pair. Various software tools, including the free version of GPG Suite from GPGTools, can create these keys. If you have a key pair already you can import it by going to Settings > Secure and using the Import ![]() icon at the bottom of the pane.
icon at the bottom of the pane.
Alternatively, you can create the keys right in MailMaven: click the plus ![]() icon at the bottom of the Settings > Secure pane and choose Generate New Key from the pop-up menu. Select the email address to be associated with the key, enter and confirm a passphrase (be sure to make a note of this in your password manager!), and click OK.
icon at the bottom of the Settings > Secure pane and choose Generate New Key from the pop-up menu. Select the email address to be associated with the key, enter and confirm a passphrase (be sure to make a note of this in your password manager!), and click OK.
Having done that setup, if you’re composing a message with a From address for which you have a secret key, you can sign it by selecting the seal ![]() icon to the right of the From address; the icon then turns green
icon to the right of the From address; the icon then turns green ![]() . Click Sign and Send to send the message.
. Click Sign and Send to send the message.
Before you can encrypt an outgoing message, however, an additional step is required: you must add their PGP public key to MailMaven. To do so, go to Settings > Secure, click the plus ![]() icon at the bottom of the pane, and choose Look Up Key from the pop-up menu. Type in the person’s email address and click Search. Then select the matching key and click Import.
icon at the bottom of the pane, and choose Look Up Key from the pop-up menu. Type in the person’s email address and click Search. Then select the matching key and click Import.
When addressing an outgoing message, recipients for whom you have public keys display a lock ![]() icon. Once the address is filled in, you can click the open lock
icon. Once the address is filled in, you can click the open lock ![]() icon to the right of the From address, which then turns into a closed, green lock
icon to the right of the From address, which then turns into a closed, green lock ![]() icon. Click Encrypt and Send to send the message.
icon. Click Encrypt and Send to send the message.
Using Templates
When you create a new message, reply to a message, or forward a message, MailMaven uses built-in templates to specify not only fonts and formatting but also the presence and placement of various elements (such as the signature, the attribution line (e.g., “On Monday, June 9, 2025, John Smith wrote:”), the way quoted text appears, and so on.
Not only can you customize every aspect of these default templates, you can also create as many custom templates as you like, each containing different elements along with boilerplate text and graphics. You can then specify which template to use when composing or replying to a message. (Currently, Forward templates can be used only in rules.)
Create or Edit Templates
To create or edit templates, go to Settings > Compose > Templates. The Default Templates section at the top lists the templates used automatically when you reply, create a new message, or forward a message. You can edit these to your liking by double-clicking them and making changes in the window that opens.
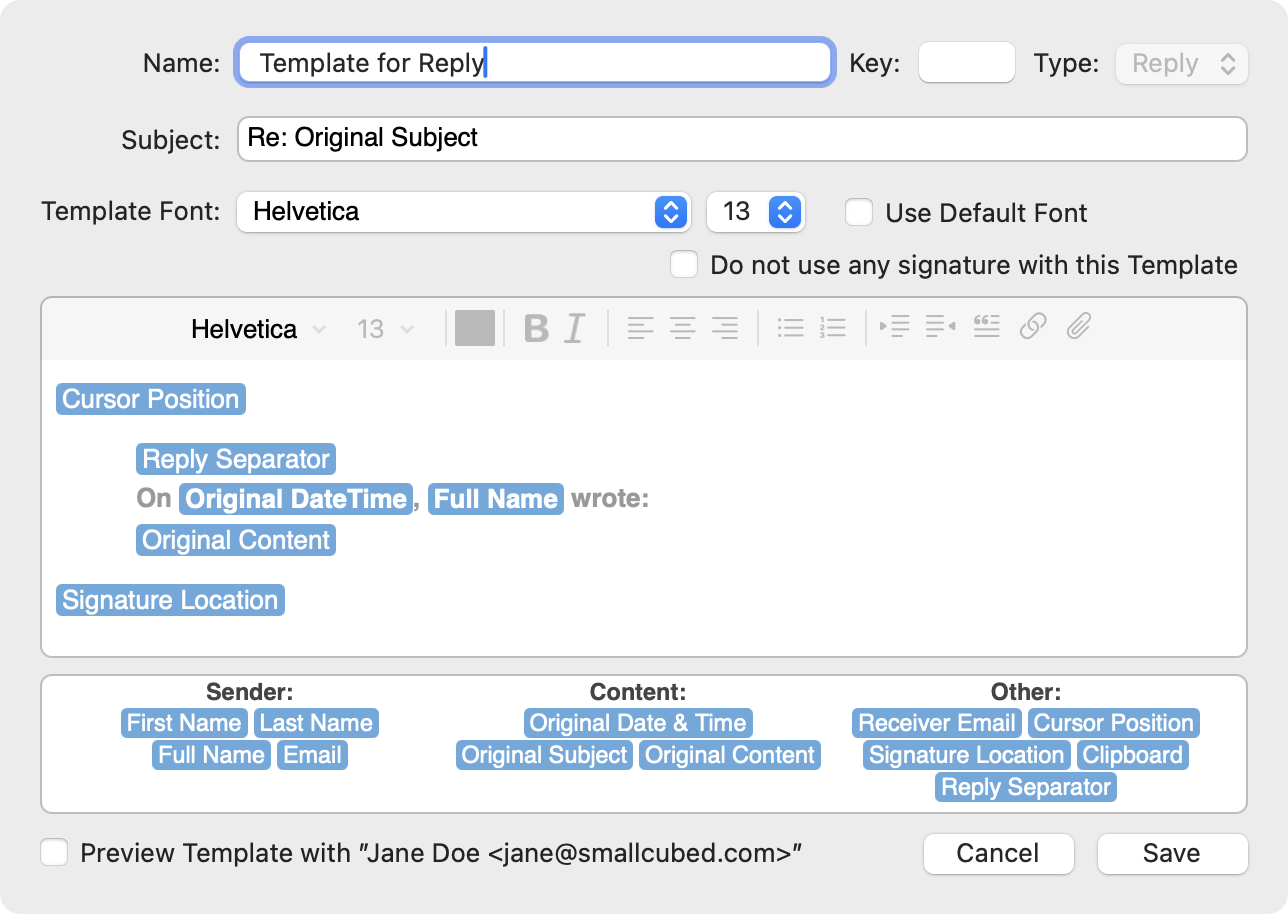
In the main field, you can type and apply formatting using the controls at the top of the field, just as when you Create Signatures. You can also drag tokens from the bottom of the window to various spots in the field; these are replaced with the current value of that item when you use the template. To see what your finished template would look like, check the Preview Template with “Jane Doe jane@smallcubed.com” box. When you’re finished with your changes, click Save.
If you ever need to revert to one of the default templates as it originally appeared, right-click (or Control-click) it and choose Reset Template.
Creating your own template is nearly the same. Click the plus ![]() icon at the bottom of the template list and fill in the window as above. Note that you must specify the template type (Reply or New) using the pop-up menu in the upper-right corner. (To create a new Forward template, right-click or Control-click the default Template for Forward, and choose Duplicate.)
icon at the bottom of the template list and fill in the window as above. Note that you must specify the template type (Reply or New) using the pop-up menu in the upper-right corner. (To create a new Forward template, right-click or Control-click the default Template for Forward, and choose Duplicate.)
Optionally, you can enter a single character in the Key field at the top, which is then used when you open the Compose with Template, Reply with Template, or QuickReply with Template panel.
Use Custom Templates
Once you’ve created one or more custom templates, you can use them when composing messages in any of several ways:
- Choose File > New Message with Template (F6), also available from the Action Panel as Compose with Template.
- Choose Message > Reply with Template (F7) or Reply All with Template (Shift-F7), or hold down Option and choose Message > QuickReply with Template (Option-F7) or QuickReply All with Template (Option-Shift-F7).
- Right-click (or Control-click) a message and choose Reply with Template or Reply All with Template from the pop-up menu, or hold down Option and choose QuickReply with Template or QuickReply All with Template. In any of these locations, select the template you want to use in the panel that appear and press Return.